Sunday, July 10, 2011

Lots of progress - Part 1

The drought has broken and I am finally sitting back down to update the progress of my boaty boat. It's been a few months, I know, and a lot has been done, so I'll break this up into a few stages.

First off, I attatched the centrecase. Pain. In. The. Something-something. I had a little help at the end for the installation, which is nice of my long suffering partner Teresa. I decided to fabricate the centrecase and install it before the stringers were glued on, and the planking and flipping nonsense, as I figured it'd be easier with the visibility and headroom. It went in ok, I didn't think it would be an easy job, but I can definitely see the upsides to lowering a case in, rather than lifting it in.

So I shaped my case sides from Kauri, cut the case from 12mm ply and glued the whole shamozzle together. I'm not entirely sure how I got everything to match, but at the end everything went together with less than a 1mm gap at the aft end of the case logs where they met the keelson. Here's the case in two parts, before being fibreglassed on the inside (175gsm cloth, 2 coats of resin) and glued and screwed together. Note here, that the case has extended sides at the bottom, and I chose to extend the centreboard case through the keelson for extra strength and water-tightness.


Next, a slot gets cut into the keelson to accept it. As I'm extending the case through, the slot looks huge and care must be taken not to damage the keelson when putting the case in. Lots of support and definitely no twisting. Plenty of time with the rasp involved getting a tight fit.


After that is out of the way a few of the frame spreaders are cut short, after extra bracing onto the stocks to ensure the frame doesn't warp. No real need in the end, as the hull with stringers screwed (but not glued yet) was plenty stiff enough to hold its shape.

Then, the case is inserted vertically and braced with some wood across the building stocks to hold it in place while I clamp it tight, and holes are drilled and countersunk for the retaining bolts (I used 1/4" 316 grade S/S bolts) which I pre-bought from http://www.stainlessstore.com.au/, who besides being cheap and lovely, post things to you in a day. I measured my lengths, bought a mixed bag of 8 bolts, nuts and washers, got it all for a good price and a timely fashion. Absolutely beats the bollocks off making the bolts myself from rod.

This is where my help stopped. I was very grateful for the help with the dry fitting, and was going to wait for a second help to do the glue-up but ended up just going for it while the lass was at work the next day. I'm all fore-sight and planning, you see. So. yeah.

It went in ok and nobody will ever hear otherwise, so it can go down in history as FACT that there was no horrible errors and swearing and lifting a heavy piece of thing upwards and trying to line up 8 bolt holes and getting camels through the eyes of needles and.....yeah. Went in Ok. After all, I only had to cut out a little chunk of my hear due to epoxy+head convergence.

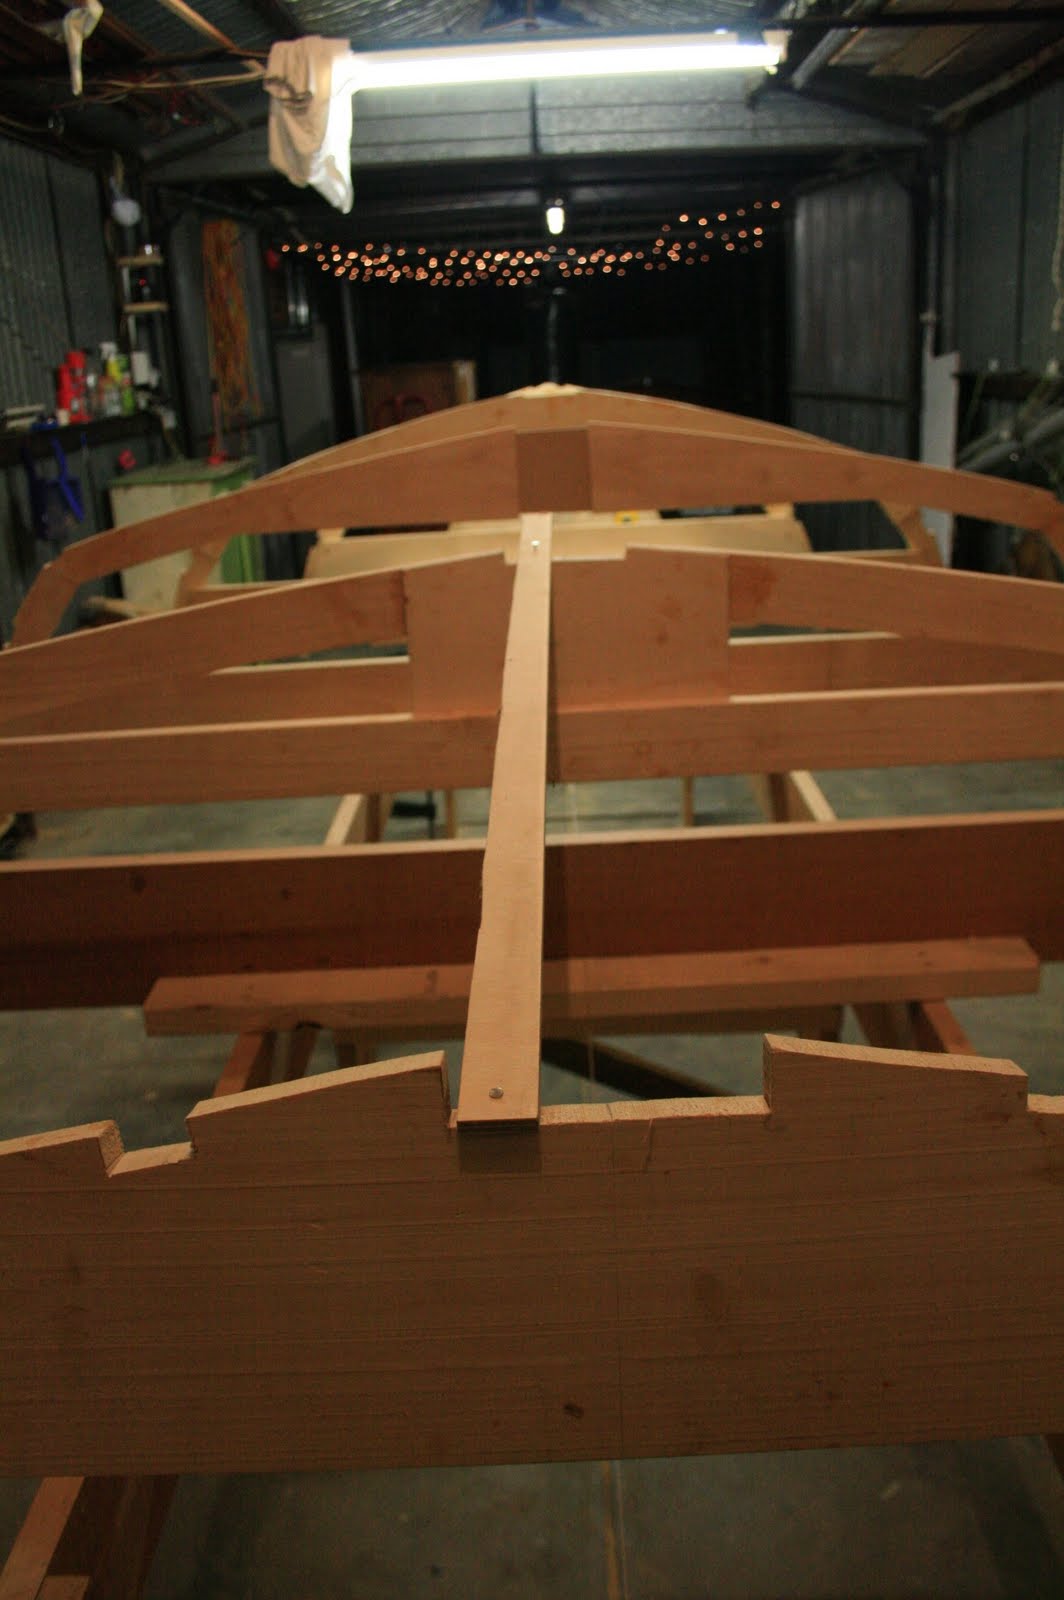
Fast forward a week, and I had something looking like this. you can't see the case in it as it has been cut down flush to the keelson, and the stringers have been glued down and chines faired also. The bevels on the chines confused me for a while, but in the end it was easiest to just take to it with a belt sander and clean up with a No. 5 plane.

That was where I was at! Next post will cover the amazing adventures of applying planking to this beast of mine.

Until next time.
Little Cat Ember

Sunday, April 3, 2011

Chines and Gunwales, ahoy!

So, since last time I was online posting about nonsense, I've done a whole lot more nonsense. Luckily, I had OH&S cat Ember to ensure I was following correct safety guidelines and that the timber I was ripping for my chines and stringers was to plan.


She's my foreman, more or less. I wasn't able to get the full 5.5m lengths in the Hoop Pine, so I wound up needing to scarf timbers together to get full length. I won't go into it because there are many who already have covered the topic, but basically it involves angled cuts on both timbers to join that overlap and are glued to result in 1 long timber.

I used a horribly unsafe tablesaw jig to do so. I convinced my lady friend and my OH&S cat it was safe. My thumbs are still attatched. Overall, I got it done without hassle.

Once that was done, they go onto the boat like so. To do this you have to bevel the slots in the frames, and bevel the chine at the stem. I found this hard. It isn't, I was just particularly slow the day I tried to do the first one, and I picked the one with the most bend possible to start with. I broke the first chine I tried to attach, but got better as I went. As you can see, I at least got 2 on. Eventually, each side has two layers.

Getting them on was intense though. I swore. At least twice. There is a significant amount of twist in the dry timber between frame 1 and stem, as you can see below. Try bending this by hand and drilling in screws at the same time.


And yet making it line up perfectly to the stem like this.


Yeah. Not easy. Enter the frame torturing jig that I remembered from some dim past browsing of the web.


A knee on this little beauty will keep everything bent, in line and perfectly secure leaving your hands free to drill away! It feels somewhat crude, cheap and nasty to use, but doing it solo I couldn't really think of any other way to do it.


The chines are left oversize at the back and trimmed down later. As you can see, 2 layers now.


And a whole lot of clamps....


A lot.

After this is all done, she winds up looking something like this:

So this looks nice. She even looks mostly symmetrical. I've now started drilling out the temporary screw holes and filling them with dowels. I've also trimmed the overhang at the transom.


Next up, install the stringers and centrecase, then I fair the chines and keelson to accept the plywood hull. Getting closer and closer to flip-day.

Sunday, March 6, 2011

Laying the keelson

A week or two has gone by since I got the boat up onto the stocks and since then I have glued in the stem. It wasn't really very tricky in the end, which is nice. I glued it prior to fitting the keelson timbers by making a small plank of offcut joined to frame 2 to centre and anchor it, and then held it in the right place with clamps while it dried. Apparently you usually wait to get the keelson shaped and fitted before gluing down, but my way gave little trouble and actually gave a good support for the keelson fitting later on.

I am actually learning quite well how to adapt what is on the plans to what is actually in front of me, which is very nice. It seems that so far my basic skills at eating chips are enough! Lovely.

My lovely partner staked the cost of a thicknesser for me for a fortnight or two so I could dress my timber at home (I love her more and more and more and she has to get a mention here or I may have a boat but no bed to sleep on in my forthcoming future. She is also very pretty. And usually right about me needing to do dishes. And buy flowers. SMIIIIILE?). Needless to say this is amazing and incredibly useful. I thicknessed and cut the timber for the keelson and laid the timbers with little trouble, except for some mis-timing with epoxy that caused a bit of a rush at the end. But you live, you learn.

I've decided to omit metal fastenings as much as possible in the build, as according to most home-building advocates and intellects they are more trouble than they're worth in the long run, and simply using epoxy and wood alone is enough, if treated right. So, in the spirit of trusting the opinions of others whilst having very little idea about what I'm doing, I used temporary screws to fasten the two keelson layers, laminated with epoxy, to the frames. This holds them together during lamination and holds them to the frame. It worked well, which is nice, though I'm still learning how much epoxy is the right amount for certain jobs. Afterwards, you need to re,pve tje screws, bore the holes out wide and plug them, usually with wooden dowels. This means you can easily plane or shape the surface, and there are no voids for air or other nonsense to hang out and basically be delinquent and troublesome.

Afterwards, you soak out the holes with unthickened epoxy, and plug em with dowels, making sure there's enough epoxy to ensure an airtight and filled join.


Yay, a keelson!


A close-up of the dowel plug (cut over-size and to be cut down like a tall poppy and sanded smooth when it's dry)


My little porcupine boat.


So next, I cut these down to size, and then do the exact same job to the chines and gunwales. Then stringers. Then bevelling the keelson, chines and stringers. Then I can plank my lady. Speaking of which, my lady might need a good thankyou planking.

So, until I do more work,

Adieu.

Saturday, February 19, 2011

A long time coming

Hi everyone and anyone who looks in on this from time to time.

I do hope everyone has had a lovely Christmas or other denominational or non-denominational period of celebration and is approaching this year so far with a sense of optimism and happiness. Recent natural disasters aside, I'm hoping for a good year.

I have been a bit distracted from this blog (and the building) for a while over the holiday period, which for me includes all of January as well - not that I would ever gloat about a thing like that. I spent some time with my Mother and her partner in Nelson,on the south-west Vic coast, going for a short trip on his TS16 under motor as the wind didn't cooperate. Lets just summarise and say this got me very enthusiastic to get stuck into my little shed-baby. Unfortunately, my little wallet baby was a needy needy nuisance. Just before the holidays I managed to purchase a mast, boom, centreplate, sails and a whole bunch of deck fittings off a wrecked TS16 salvage. This set me back about a grand I didn't have, but saved me a whole lot in the long run. A stitch in time, they say. I have to admit I agree!

Anyway, shortly thereafter, on meagre funds, I finished off the majority of the frames and then a pay cycle later, the building stock. Giving me roughly this:


A rather messy garage and some rather useless frames. They did come together very well and I'm sorry I've skipped a bunch of stuff that I did, particularly the building of the strongback. It wasn't hard as such, but for someone with the same level of knowledge regarding building or construction in timber as a snail does of jet transportation, I learned a lot doing it.

Since then, I've been working fairly consistently on the project where funds, SWMBO, time and energy allow. I'm just going to give you a wall of pictures much more interesting than my ranting to look at, sound good? Awesome.

I'm an art teacher - If I can do it in pictures instead of words.. GOD WILL I!

What a lovely nose.


You can really start to see the shape once it's up on the strongback. Makes it feel somewhat possible to a rank amateur like myself.


This is a special block for the stem to fit into that lets it rest into frame 1 at the right angle for the keelson to lay into frame 2. It is detailed in the plans, but I've rarely seen an image of it in any building blog, probably as once you glue the stem into frame 1, it's no longer needed. That said, I have heard a number of people mention how damn hard it was to align their stem. This thing = EASY PEASY!


Exhibit A. Less than 1 minute of fiddling. Just because I wanted to.


To get the stern frame to sit at the right angle - it's angled inward at the top end by about 12 degrees - I used a simple batten that got the lean going, then used the frame to bevel the cleat on the stocks.


Like so!


I also properly organised the shed, installed shelves for my power tools and hooks and stuff for my other things as a) I am a slob when allowed, and b) if things have a place I'm usually compelled to put things in it. If you look at the first picture, MASSIVE IMPROVEMENT.

I look almost organised.


And this, is the moaning chair. It is where I sit, cradle my head, and wonder whatever I was thinking when I started the whole thing. Also, where I sit contented about my work.


And that's the news!

Till next time,
Happy whatever-ing.

Monday, November 22, 2010

Frames coming together.


So the last few days have been pretty productive. As well as cutting out all my frame members roughly on a band saw, I have placed the templates back on to them in preparation for sanding and shaping them back into size. I thought it'd be smart to cut them all a few millimetres oversize and sand them in than to go for the perfect fit first time. I've also transferred all the templates of gusset pieces for the frames onto a sheet of ply ready to jigsaw out a little later this-evening when it cools a little, if it cools a little. You can sort of see the ply behind my head.


Wonderfully, I made an amazing (and entirely lucky) $40 purchase on Sunday of a set of removable roofracks for the Pajero, meaning now I can freight my own timber and ply around. Previously I was paying delivery of anywhere between 25-65 bucks a pop, no matter how little I ordered. Needless to say, the cost of less than one delivery for every delivery from this point on has made me pretty happy. Also, as the type I got in as-new condition retail for $265, I'm super happy. Lick-a-kitten kind of happy.

I'm really happy with the hoop-pine timber I bought for the project. It is light and strong, tightly grained and straight grained and seems well worth the $8 p/lm I'm spending on it, considering that bunnings would charge around the same for plain yellow pine which is 1/4 the quality. The other option I was considering (Kauri) was a comparative $22 p/lm for the same WxT, so I think I made a good choice. I've decided to go with Hoop Pine Marine Ply also, seems everyone is raving about it and from what I can see, for good reason.

I'm hoping I'll have the frames assembled and gluing by this time next week!

Exciting. Look Down, Back Up, What is it? It's an Action Shot!

Friday, November 19, 2010

Progress?

Well, well, well. About a month has passed since I recieved my plans and building guide and yesterday I recieved my first delivery of timber. They day was unpromising and fairly drizzly, but given that I'd procrastinated a month or more on a timber choice I didn't want to let the day waste, even if the sky did look like it was suffering some form of depression.


I decided to shorten the lengths of timber from their 4.5m-ish lengths to 1-2m lengths depending on best-fit for the frame members, which are the first things to make. I fiddled around with arrangements for the parts and luckily had all the pieces fit exactly into the amount of timber I had. I did accidently cut the transom frame bottom in half when it is meant to be a solid timber, but I can repair that by epoxying the halves back together and reinforce it with a ply gusset. It'll probably be stronger than before doing it that way, if a little heavier. Given that it's going to have an outboard attatched to it anyway, it's hardly going to break the balance of the boat or anything. Worst case scenario, I replace the timber and cut it again. I hacked the boards into shorter lengths and carted the whole lot off to school.


The great thing about being an art/design teacher at a secondary school is the access to a machine shop that is reasonably well equipped to deal with the kind of project I'm undertaking. In my spare periods today, after getting all my lesson prep done nice and quickly, I pottered around for an hour or so, a lunchtime, and an hour after school and got all the boards thicknessed to 19mm from the raw boards, all the templates transferred to the wood pairs, and roughly cut 3 or so pairs of frame members. The rest will have to wait until monday when I can get back to the bandsaw.


And finally, my meagre successes:


I've started now. It is odd, but those first three frame members up there are telling me I will succeed at this. I don't know why, and whether it is madness already setting in, but they're whispering success at me.

And advice about who to kil......

Success.. Just success..

Monday, November 15, 2010

The start of something beautiful.

Most people who know me know that I get obsessed. Addicted. Chemically bonded to ideas and soft drinks. Mostly ideas. Well, as usual, it's happened again.

Last year I decided to learn Cello and while I can't say that this was entirely a success story, I had a go. It turns out that it is much harder to learn as an adult. Who knew? I didn't and now I do. I'm not entirely giving up on it but it is definitely taking a back seat for the next little while while I do something that sounds less like cats having their claws pulled. Enter, building a boat!

Yeah, I sure do pick them. You heard right. Learn a damn tricky musical instrument? Nah. That's a bit tricky. I know! Build a hunk of wood and metal that goes to sea where sharks live; where they watch their snacks move around before nibbles like so many diners in a fancy oriental restaurant. Surely I can accomplish this and not give them a time delay sinky-snack, right? Not tricky at all.

Anyway, the prattling long story short is, I'm building a Hartley TS 16. For those of you who don't know what this looks like the design looks like this:
At least, that's what the design sketch looks like. More accurately it looks something like this:


The photographs are pretty vintage as the boat was originally designed somewhere in the mid '50s, but the design is simple, straight-forward and largely achievable for someone with moderate skill. At this point in my research after getting my bug bitten my brain did this:

"achievable by the average handyman with moderate skill....."
"Wait!! I HAVE MODERATE SKILLS! AT LOTS OF THINGS"

Then went an impulse purchase of plans and tools, followed by the dawning of a pretty important realisation. My moderate skills are NOT RELATED to boat-making. At all. I'm moderately good at eating chips. I think the advertisement should have been more specific. That said, I learn fast and when I'm obsessed by something as I surely am, I learn a lot very quickly. There is also a wonderful group of people who adore the design and have been a great help with starting questions and tips.

I will keep this blog updated with the progress of the boat, or lack thereof, as I go. I'll also pop in some random other things I seem to do to pass the time when I pass some. I'll try to avoid showing you the things I pass though as I honestly don't know you all that well.

Till then.
Ciao